

Writing GitHub Actions in Python
I invented PyAction and here is how you can write your actions in a flash!


GitHub offers the maintainers and developers, three ways of developing and maintaining Custom GitHub Actions.
Docker-based Actions
Javascript Actions
Composite Actions
As you can see, GitHub's runners officially support shell-based and Javascript-based actions. What if we need to implement the actions in Python?!
Of course, we can use either Docker-based or Composite types for creating our Python actions but is that the real deal?! What if we need to access the variables declared during the workflow run? Since Python is not officially recommended as a tool for writing actions, it doesn't mean we can't have actions in Python.
I wrote an open-source template called PyAction that allows you to write GitHub Actions in Python. You have almost all the accesses that a Javascript developer has but in fact, you're using Python's syntax and have Python's power.
In this article, we will make a quick hello-world demo action project using my tool. I hope this article helps you out in case you're using PyAction.
Introducing PyAction
PyAction is a Cookiecutter template that helps you write Actions in Python. It's based on the Dockerfile implementation that GitHub recommends and has some workflow-related features that allow you to have access to the variables and data transferring during your workflow executions that we'll see later on.
Note: This tutorial is based on PyAction v0.1.0
Creating Actions
In this section, we'll be implementing a hello-world action using PyAction from the very first step.
Install cookiecutter
The tool that you need to generate a PyAction template is nothing but cookiecutter. Make sure you have Python and pip installed and updated on your machine and install cookiecutter.
pip install -U cookiecutter
Once you have this package installed, make sure that it's installed successfully by checking its version number.
cookiecutter -V
Generate the hello-world template
Use the cookiecutter template to pull PyAction's template.
cookiecutter gh:lnxpy/cookiecutter-pyaction
At this point, Cookiecutter will ask you some questions to generate the most suited action for you. Here is how I managed to answer the questions for my hello-world action. I only listed the important answers.
| Question | Description | Answer |
| Action name | name of your action | Hello World |
| Project slug | directory/repo name | hello-world |
| Python version | the Python version that you want to use in your action | 1 (Python3) |
| Include dependencies | whether your action has additional dependencies | n |
| Branding Icon | the Feather icons that GitHub uses in its marketplace for actions | activity |
| Branding color | the color of the branding icon | 1 (White) |
If you want to release your actions in the GitHub Marketplace, make sure you choose a unique action name as GitHub warns..
The
namein the action's metadata file must be unique.
The
namecannot match an existing action name published on GitHub Marketplace.The
namecannot match a user or organization on GitHub, unless the user or organization owner is publishing the action. For example, only the GitHub organization can publish an action namedgithub.The
namecannot match an existing GitHub Marketplace category.GitHub reserves the names of GitHub features.
Adding dependencies for your action: If your action has dependencies, make sure to put y for the Include dependencies prompt. All it does is it creates a requirements.txt file as well as an additional layer in your Dockerfile. Install the requirements of your
Once you answered all the questions, your action will be in hello-world/. Here is a quick tree of what we have so far.
hello-world
  ├── Dockerfile
  ├── LICENSE
  ├── README.md
  ├── action.yml
  ├── actions
  │     ├── __init__.py
  │     └── io.py
  └── main.py
All we need to change are action.yml, main.py, and README.md files.
Implementation
We want the users to be able to pass a name variable to our workflow and see a Hello {name} message in their workflow running logs tab. So, our action has only one INPUT and OUTPUT. Here is how we should change the inputs and outputs values of the action.yml file.
...
# == inputs and outputs ==

inputs:
  name:
    required: false
    description: the person/thing you want to greet
    default: World

outputs:
  phrase:
    description: output message
This way, the users can call our action with their desired name value. After that, they will have access to the phrase variable which contains the greeting message.
Now, it's time to write a simple hello world program in our main.py file.
import os
import sys
from typing import List

from actions import io


def main(args: List[str]) -> None:
    """main function

    Args:
        args: STDIN arguments
    """

    # reading the name variable from `with`
    name = os.environ["INPUT_NAME"]

    # writing to the buffer
    io.write_to_output({"phrase": f"Hello {name}"})

    # now, people can echo `phrase`


if __name__ == "__main__":
    main(sys.argv)
Testing
Let's push our action to GitHub and test it in a simple workflow. I'm going to create a workflow inside my action repository to test it. You can test your action from whole another repository.
For that matter, I create a simple workflow before I push it to the GitHub repository that I've created before. Here is my main.yml workflow.
# .github/workflows/main.yml
name: Testing My hello-world Action

on: workflow_dispatch

jobs:
  build:
    runs-on: ubuntu-latest

    steps:
      - name: Checkout code
        uses: actions/checkout@v2

      - id: greetings
        name: Using hello-world
        # use the action that's inside the same repository
        uses: ./
        with:
          name: Sadra

      - name: Echo phrase
        run: |
          echo ${{ steps.greetings.outputs.phrase }}
We're almost set. If you head over to the Actions tab, you'll see that your workflow is listed there. Since it gets triggered on the workflow_dispatch event, you can run it manually.
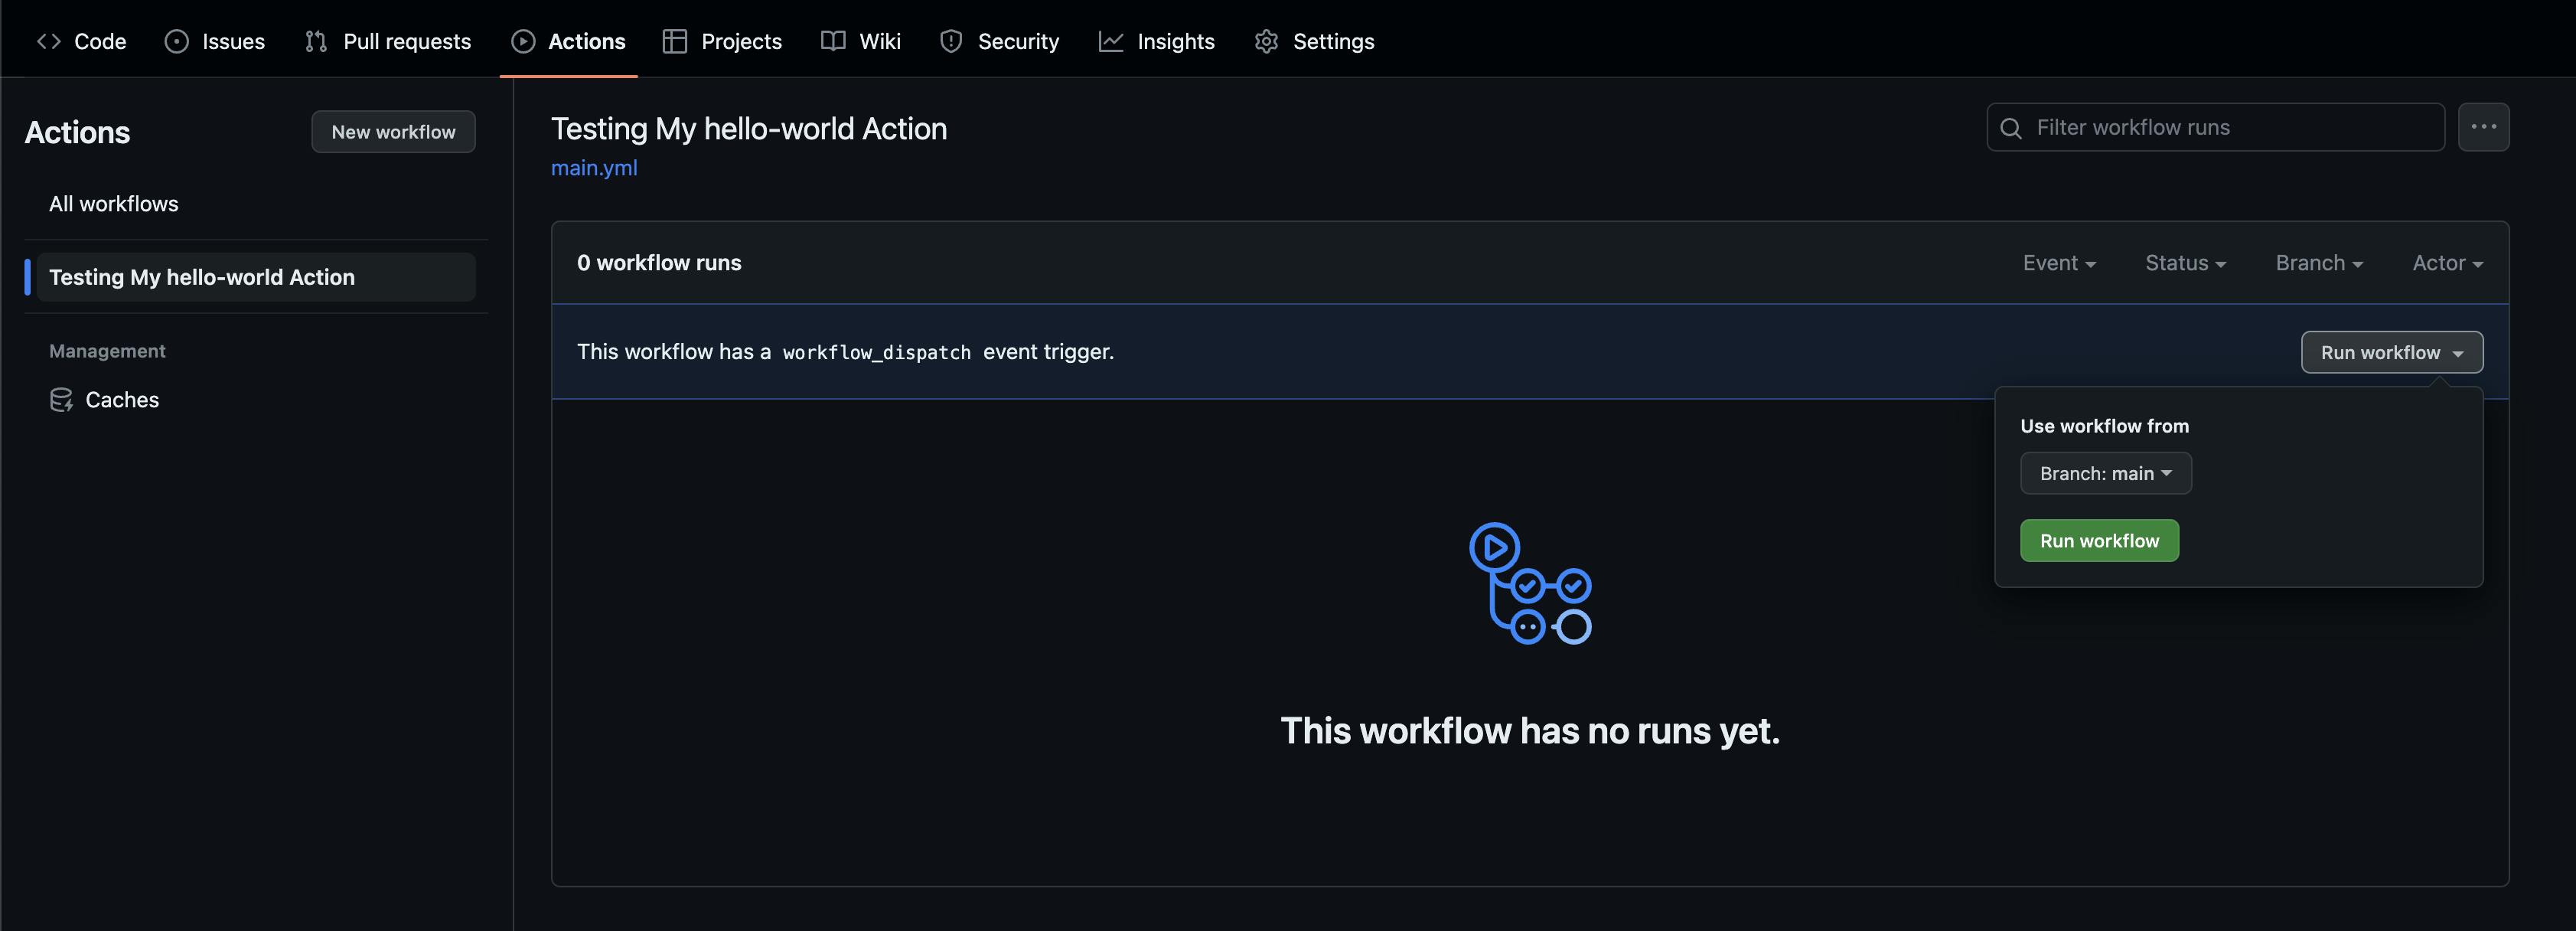
Run the workflow and go to the workflow running tab to see the steps passing. Let's see if our hello-world action is working correctly. It's supposed to echo out the phrase variable with name=Sadra.
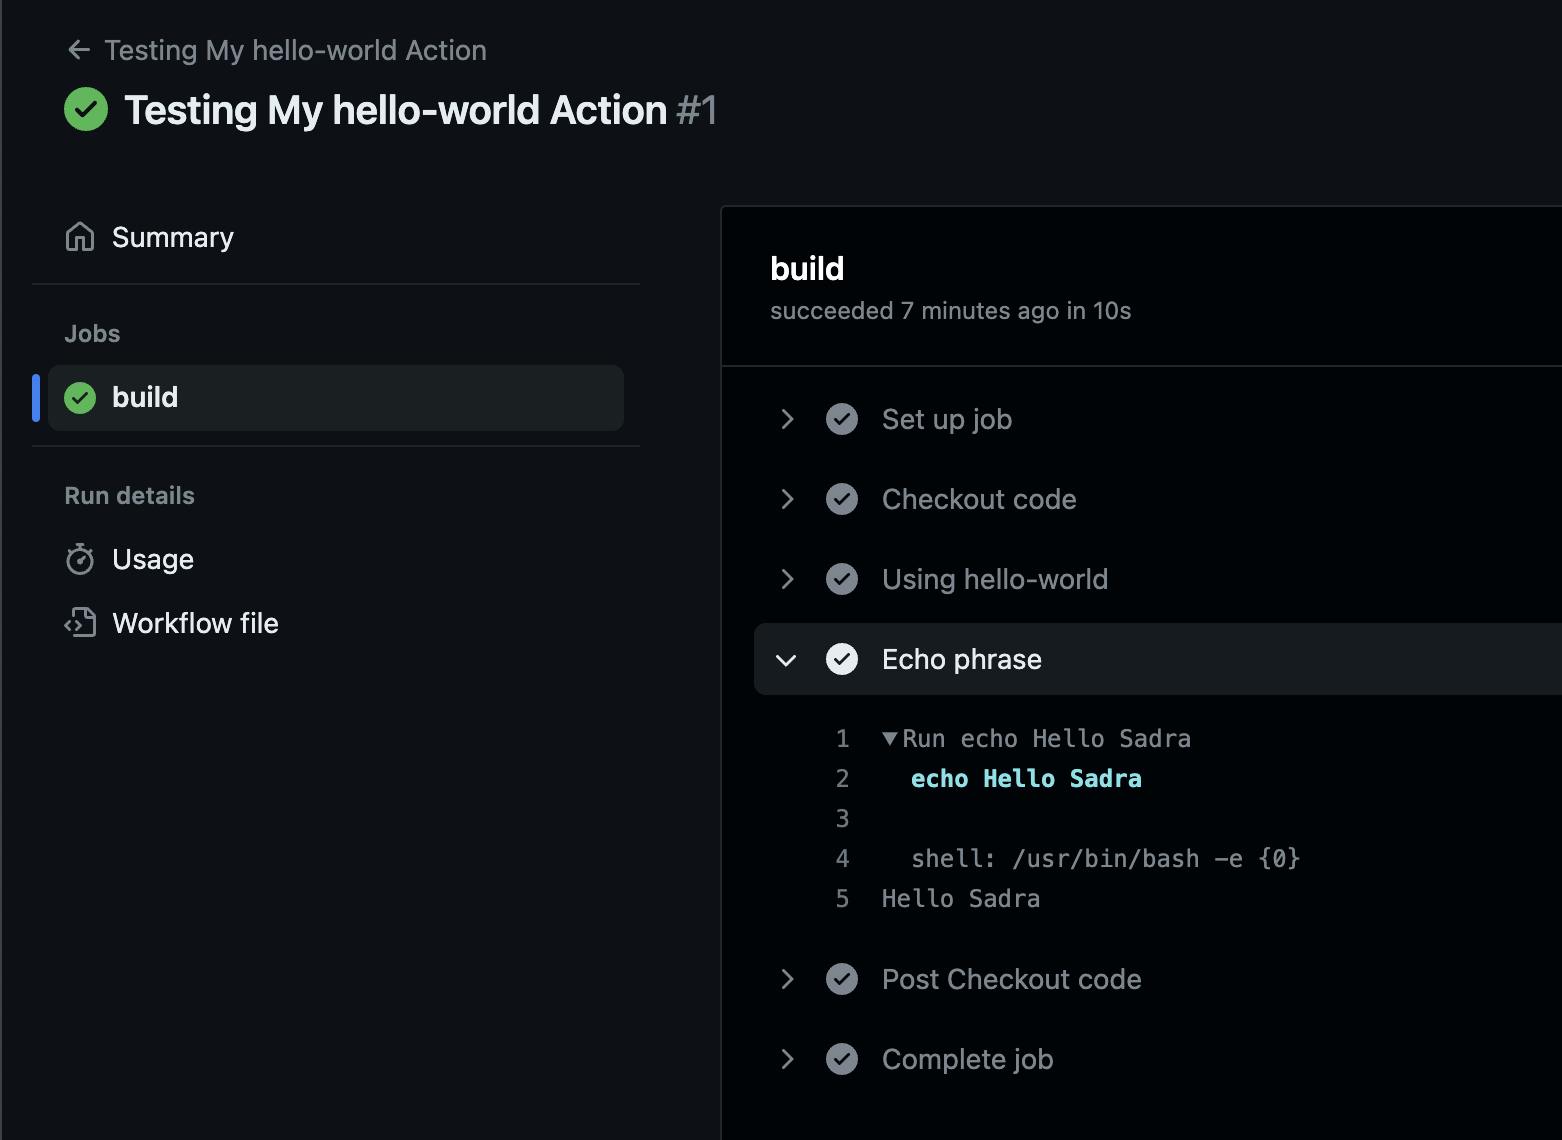
As you can see, inside the "Echo phase" step, it can access the name variable. That's amazing.
This time, remove the with statement inside your main.yml workflow to check if the default World value that we set for INPUT_NAME works. Here would be the newly updated main.yml file.
      ...
      - id: greetings
        name: Using hello-world
        # use the action that's inside the same repository
        uses: ./
        # no more with

      - name: Echo phrase
        run: |
          echo ${{ steps.greetings.outputs.phrase }}
Head back to the Actions tab and run the workflow once again. This time, we suppose our action to put Hello World inside the phrase environment variable.

And that's it. With a little bit of changing the main.py and action.yml files, you can create awesome handy actions. You can even tag your actions and publish them on the GitHub Marketplace. Check the next section for more instructions on that.
Useful Links
Here is the PyAction repository on GitHub. Don't forget drop by and show us your love by giving the project a little shiny star. :)
The example that I brought you here today is available on my GitHub repository as well. You can check it for the sake of more clarity.
If you want to choose branding icons and colors, you may find this tiny tool useful. It helps you find a proper branding icon as well as a color for your action. (branding is only available for marketplace actions)
DO NOT forget to follow the official instructions if you've aimed to publish your action on the marketplace. Here are the docs.
Conclusion
This article gives you a brief showcase of how you can write GitHub Actions in Python using PyAction. Throughout this quick tutorial, we created a hello-world action via PyAction and pushed it to GitHub, and saw how our Python source code work underneath our workflows as actions.